Using ORB-SLAM + ROS to map the world.

What is Orb SLAM?🟢
SLAM is short for Simultaneous Localization and Mapping. It is a process which is mostly used for determining the position of a robot with respect to its environment. Its quite similar to what you would do when you wake up after partying so hard that you don't remember what you did the night before. You would get up and scan the room, and maybe if you're lucky, you find yourself in a familiar room. This is quite what happens in SLAM. The camera (or range sensors like LIDARs) on the robots continuously sense the information of their surroundings. For each image frame, they find feature points using an algorithm like ORB, hence the name ORB-SLAM. These features are tracked in time and pixel space of the images and are then used to build an understanding of where the robot might be given the information extracted from these frames. This is the basic idea of how SLAM works, however the modern solutions are quite complex and would require a full explanatory post of itself (which I might upload later!).
Let's ROS!🐱🏍
ROS (Robotic Operating System1) has a variety of packages for all your robotics need and SLAM is no exception to that.
For this post we are going to be looking at the orb_slam2_ros package which supports a lot of cameras out of the box (complete list).
First, make sure you have ROS installed and setup (installation guide here).
For this post I'm going to be working with ros kinetic and Gazebo 7 which will come installed if you go for the full desktop installation of ROS.
Create a catkin workspace if you don't have one or want to test it out on a fresh workspace!
$ mkdir -p ~/<workspace-name>/src
$ cd ~/<workspace-name>/
$ catkin_make
Note ROS is not compatible with python 3 out of the box. If you need to achieve that you would need to build ROS as well as your workspace from source with a special flag specifying the correct python 3 executable instead of the python 2 one (which is the default). This can be quite painful and is not recommended for the faint-hearted. But if you do dare to do that, you can follow this tutorial to do so! Here we are going to be sticking to python 2 for this post and pray that the python community doesn't look down upon us😪.
Clone the orb_slam2_ros package into the src folder.
$ cd src
$ git clone https://github.com/appliedAI-Initiative/orb_slam_2_ros.git
$ cd .. && catkin_make
Now we want to set up Gazebo world and spawn robot model with a camera installed.
I'll be using the turtlebot 3 package as it comes with most of the prerequisites needed for this task out of the box.
You can install turtlebot3 packages either to your ROS installation, or you can clone the repository in the current workspace and run catkin_make again.
I would recommend the former if you would regularly use turtlebot 3 and have majority of your projects involving it, otherwise it is wise to clone the repository in the workspace.
$ # Installing in alongside ROS
$ sudo apt install ros-kinetic-turtlebot3

$ # Installing in alongside ROS (specific package)
$ sudo apt install ros-kinetic-turtlebot3-<pkg-name>

$ # Installing in workspace
$ cd src
$ git clone https://github.com/ROBOTIS-GIT/turtlebot3
$ git clone https://github.com/ROBOTIS-GIT/turtlebot3_msgs
$ git clone https://github.com/ROBOTIS-GIT/turtlebot3_simulations
$ cd .. && catkin_make
$ source devel/setup.bash
If you use zsh instead of bash the you need to source devel/setup.zsh.
Now we can run different launch files and see the results.
You would need to run the launch files in different terminal sessions.
You can use terminator, tmux, screen or even tab out your terminal (i won't judge 😄!!).
To launch the gazebo simulation with a turtlebot in a house run the command below.
You can also add your custom maps in gazebo and go full on loco!
$ export TURTLEBOT3_MODEL=waffle
$ roslaunch turtlebot3_gazebo turtlebot3_house.launch
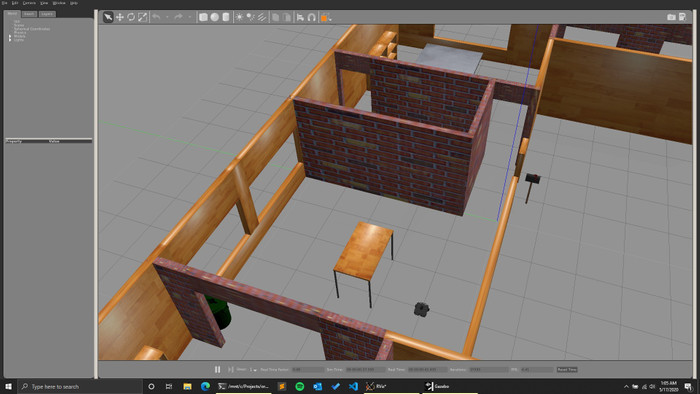
 Gazebo launched with Turtlebot3 Waffle inside a house environment.
Now we need to run the ORB SLAM algorithm.
This can be done by running the command below.
Note that by default the
 WAFFLE configuration comes with the intel's realsense r200 camera plugin.
We can use this camera in all the three modes porvided by the orb_slam2 package.
$ roslaunch orb_slam2_ros orb_slam2_r200_mono.launchDuring the time of writing this article, the launch files orb_slam2_r200_rgbd.launch and orb_slam2_r200_stereo.launch were missing a camera parameter from their launch files which would result in the following error.
$ Failed to get camera calibration parameters from the launch file.
    terminate called after throwing an instance of 'std::runtime_error'
    what():  No cam calibration
To resolve this just make sure that the following parameter is present in their respective launch files:
<param name="camera_k3" type="double" value="0.0" />You would also need to remap the topics in the orb_slam2_r200_rgbd.launch as the topics that the ROS node started by these files subscribe to a different topic.
This can be achieved by remapping the topics that they subscribe to, to the actual topic name where the data is going to be published.
In our case it would be /camera/rgb/image_raw and /camera/depth/image_raw for rgb and depth images respectively.
To remedy this make sure that you change the topic names in the launch file so that it looks like the following:
<remap from="/camera/rgb/image_raw" to="/camera/rgb/image_raw" />
<remap from="/camera/depth_registered/image_raw" to="/camera/depth/image_raw" />
If you go with the mono version, then you might get a constant stream of Map point vector is empty! on your terminal.
Don't worry, It is because the monocullar SLAM is not initialized yet.
To compute depth, the monocular slam uses a concept called parallax, which relies on the difference in the rate of percieved movement of objects at different depths.
You would need to move the turtlebot around until the system is initialized.
You can do it by launching a teleop node by running the following.
$ roslaunch turtlebot3_teleop turtlebot3_teleop_key.launchTo view the image captured from the camera of the turtlebot you can run the following:
$ # for rgb images
$ rosrun image_view image_view image:=camera/rgb/image_raw
$ # for depth images
$ rosrun image_view image_view image:=camera/depth/image_raw
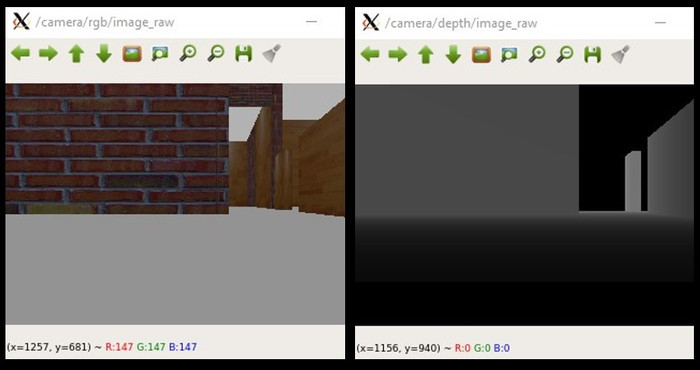
 Image view with rgb image observed by the Turtlebot on the left and the depth image on the right
If you dont have the
 image_view package installed, you can install it easily by running sudo apt get install ros-kinetic-image-view.
As a side note you can install any ROS package directly into your ROS installation by running
sudo apt install ros-<ros_distro>-<ros_package_name>. This convention comes in handy a lot of times!!
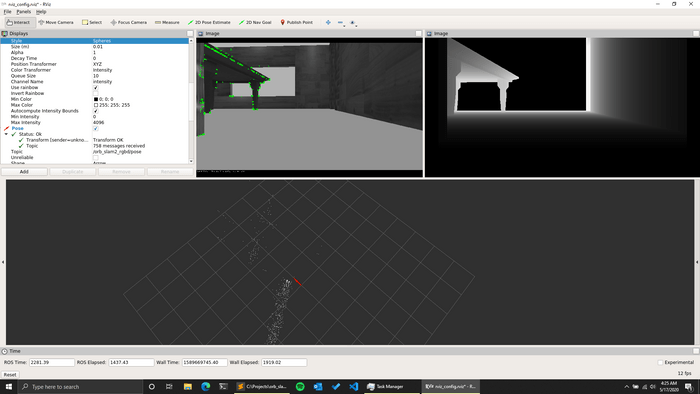
 Screenshot of rViz displaying the features recognized by ORB SLAM and the depth map (above). The point cloud of all the recognized features used for localization (below).