Getting Started with Unity With ROS Using ROS# Library.

What is Unity?
Unity is a game development platform that is used for building 2D and 3D games. It is also used for developing augmented reality (AR) and virtual reality (VR) applications as well as simulations and other experiences. In this post I'll be covering the steps on how to use Unity and interface it with ROS to showcase your simulations and robotic applications in a more realistic environment. In particular we will be using a TurtleBot 3 robot and try to control it via ROS
Prerequisites
- Download and install Unity3d for your operating system.
- Install ROS.
- If you are using Windows 10 then you might want to consider installing ROS in the Windows Subsystem for Linux (WSL). Install an Xserver for rendering desktop applications on WSL 1 2.
- Clone the RosSharp (ROS#) repository.
- Make sure you are all set with all the dependencies of ROS#.
Setting up the workspace! 🐢
Create a new catkin workspace. This and
$ mkdir -p ~/unity_ws/src
$ cd unity_ws
$ catkin_make
Install the necessary packages for turtlebot3.
Make sure that you can view your ROS distro by executing echo $ROS_DISTRO in the terminal.
If you don't get an output then you might have to source the setup.bash for ROS (setup.zsh if you use zsh).
$ cd ~/unity_ws/src
$ git clone https://github.com/ROBOTIS-GIT/turtlebot3
$ git clone https://github.com/ROBOTIS-GIT/turtlebot3_msgs
$ git clone https://github.com/ROBOTIS-GIT/turtlebot3_simulations
You would also need to install the rosbridge_suite package.
This package is how Unity is able to communicate with the rosmaster.
$ git clone https://github.com/RobotWebTools/rosbridge_suiteThis works by establishing a socket connection with a host running a rosmaster instance and then issuing requests via the sockect connection.
Rosbridge server enables communication between a client and a server running the rosmaster instance via passing JSON messages which gets converted into ROS calls on the serverside.
It also converts any any ROS calls generated on the server end into valid JSON objects that can be parsed by the client libraries.
This is what Ros# uses to connect Unity with the ros master.
Now you just have to run catkin_make from your workspace directory and wait for ros to build all the packages.
Run source devel/setup.bash to make sure that ros can find all the packages that you build in your new workspace.
Rosbridge can be used in other instances as well. For instance, in a web application where you might need to update data in realtime. Instead of patching requests through a backend server and then serving it to ROS, you can go through the middleman and directly get the data from publishers and service calls!! There's more about rosbridge later in the post.
Setting up Unity
Start off by creating a new project in Unity.
Clone the ROS# repository.
Copy the folder named ROS to the src folder of your catkin workspace.
Copy the folder named Assets/RosSharp into the Assets directory of your Unity project.
Double check that Unity is using .NET Framework 4.x which is required by ROS#. You can check it by going into
Edit > Project Settings > Player. Look intoOther Settings > Configuration > API compatibility Level. Change it to.Net 4.x Equivalentif it is not already in that setting.
 Make sure o have .Net 4.x enabled in the settings as shown above.
Importing Robot Models
Ros# consists of a set of libraries that enables communication between ROS and Unity. You can use the tool provided by ROS# to publish the URDF model from Ros and the get it into Unity. To do that, launch the following:
$ roslaunch file_server publish_description_turtlebot2.launchThis launchfile will start rosbridge_server and then publish the turtlebot2 model, however, you can change it to use the robot decription of which ever robot you want by changing the parameter value of the robot_descrtiption argument.
 Transfer URDF from ROS plugin menu.
In Unity, go to the RosBridgeClient > Transfer URDF from ROS option.
Change the Address to the IP address of the machine running ROS (If you are using WSL on Windows you can use localhost instead).
Make sure to change the protocol from Web Socket NET to Web Socket Sharp in the settings, as shown in the image.
 Imported Turtlebor3 Waffle Model in Unity using the ROS# URDF plugin.
The First Connection 🛸!!
First we need to make sure that this Unity is able to communicate with ROS.
For this we will be using the rosbridge_server package for ROS.
This package exposes the roscore running on a machine to be accessible via websockets.
What's the advantage, you ask?
Well for one, now you can communicate with a ros node from a machine using just this websocket.
You don't need a ros installation of ROS to communicate (subscribe/publish topics or make service calls) with a ros node - you can use a browser to communicate too, if you like.
The rosbridge_server exposes a websocket that clients can connect to, and these clients can be generated using the client side libraries like rolibjs for JS, jrosbridge for Java and roslibpy for python.
However, ROS# has its own such library for C#.
 An overview of Ros bridge and communication with roslibjs client. Source Web Applications for Robots using rosbridge by Jihoon Lee
First, we need to create an empty object in Unity (I chose to rename it to RosConnector).
We will use this object to add scripts that communicate with ROS.
On the right pane we first need to add the RosBridgeClient script to this object which will be responsible for communication with the rosbridge_server to send and receive requests like publishing and subscribing to topics.
First let us start the rosbridge_server node by running
$ roslaunch $(rospack find rosbridge_server)/launch/rosbridge_websocket.launch
 Steps to setup Rosbridge client on Unity.
By default the rosbridge_websocket node uses the port 9090.
Change the value of Ros Bridge Server URI depending on your setup and then click the play button located at the top center of Unity.
When Unity switches to Play mode you would be able to see that the rosbridge_server was able to establish connection with Unity as it prints out a debug message stating the 1 client has been connected.
 Debug output of the
 rosbridge_websocket node after unity establishes connection with it.
Moving the turtlebot at will !!
To move the Turtlebot3 we need to use the cmd_vel topic to publish the command velocities that we would need the turtlebot to execute.
We can use the TwistSubscriber script provided by ROS# to provide the turtlebot to translate and rotate with respect to the world around it.
Add the TwistScubscriber script to the RosConnector object and configure it according to your setup.
For the Scubscribed Transform field drag and drop the turtlebot model from the left pane onto the field.
This makes the turtlebot model move on receiving messages on the /cmd_vel topics.
 Twist Subscriber configuration on my turtlebot setup.
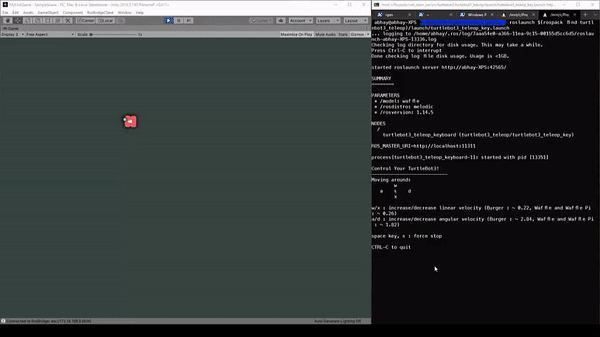
Make sure you also launch the turtlebot_teleop_key node to send messages to /cmd_vel topic.
You can do so by running:
$ export TURTLEBOT3_MODEL=waffle
$ roslaunch $(rospack find turtlebot3_teleop)/launch/turtlebot3_teleop_key.launch
Now you are all set to control your turtlebot from ROS and visualize it in unity!!
 Using Teleop node to control the turtlebot waffle on Unity.